
Disclaimers:
- No, these are not meant (or supposed) to be "hi-fi". More just for a bit of "ambient noise", if you will, for movies with 5.1 soundtracks. That, and possibly alternative monitoring for checking mixes.
- No, these are not meant to go terribly loud. Due to, let's call them, physical constraints, they'll be placed at the corners of my sofa (right up against the wall, opposite the TV and the "mains"), so no huge SPL's are required.
On to some (more) background then. Along these past couple of years, i got to gut a several dead TV's - sold off the power supplies and mainboards, where it was worth it, and/but kept the speakers and wiring harnesses. I had a few other pairs of TV speakers, but my "OCD" was bothered by their lack of symmetry (of the cases / mounting points) between the left and right.
Thus, while increasing my scrap-heap - i mean, "collection", i ended up with two pairs of pretty much identical Samsung speakers, BN96-12832A and -C respectively. Before landing the second pair, i had been considering a single one per side, but hey - if you've got it, flaunt it, right? Splitting the SPL between two on each side, means each individual one will have to work that much less hard.
Now, the mechanicals... Since the mounting "ears" for these are recessed "into" the main volume of the boxes (as opposed to sticking out off an edge), i had to get a bit creative with the mounting solution. After a few minutes of brainstorming and mock-ups, i pretty much nailed the solution (no pun intended) - sandwich the wood-strip (which would be the main "stalk") between the two speakers, so the mounting ears would end up facing inwards. But since a picture is worth a thousand words...

One slight niggle was that the sides of the speaker enclosures were anything but flat, especially with that anti-rattle strip of foam-tape. The solution was quite simple - after confirming that some M8 bolts fit just about right through those grey soft-rubber grommets, i figured what's wrong with a using washer or two, as spacers? Another quick mock-up indicated that, if one was to make sure the washers wouldnt' stick outside the edges of the wood strip, that would make the front of the speakers pretty much flush with the front edge of the "leg" - great!
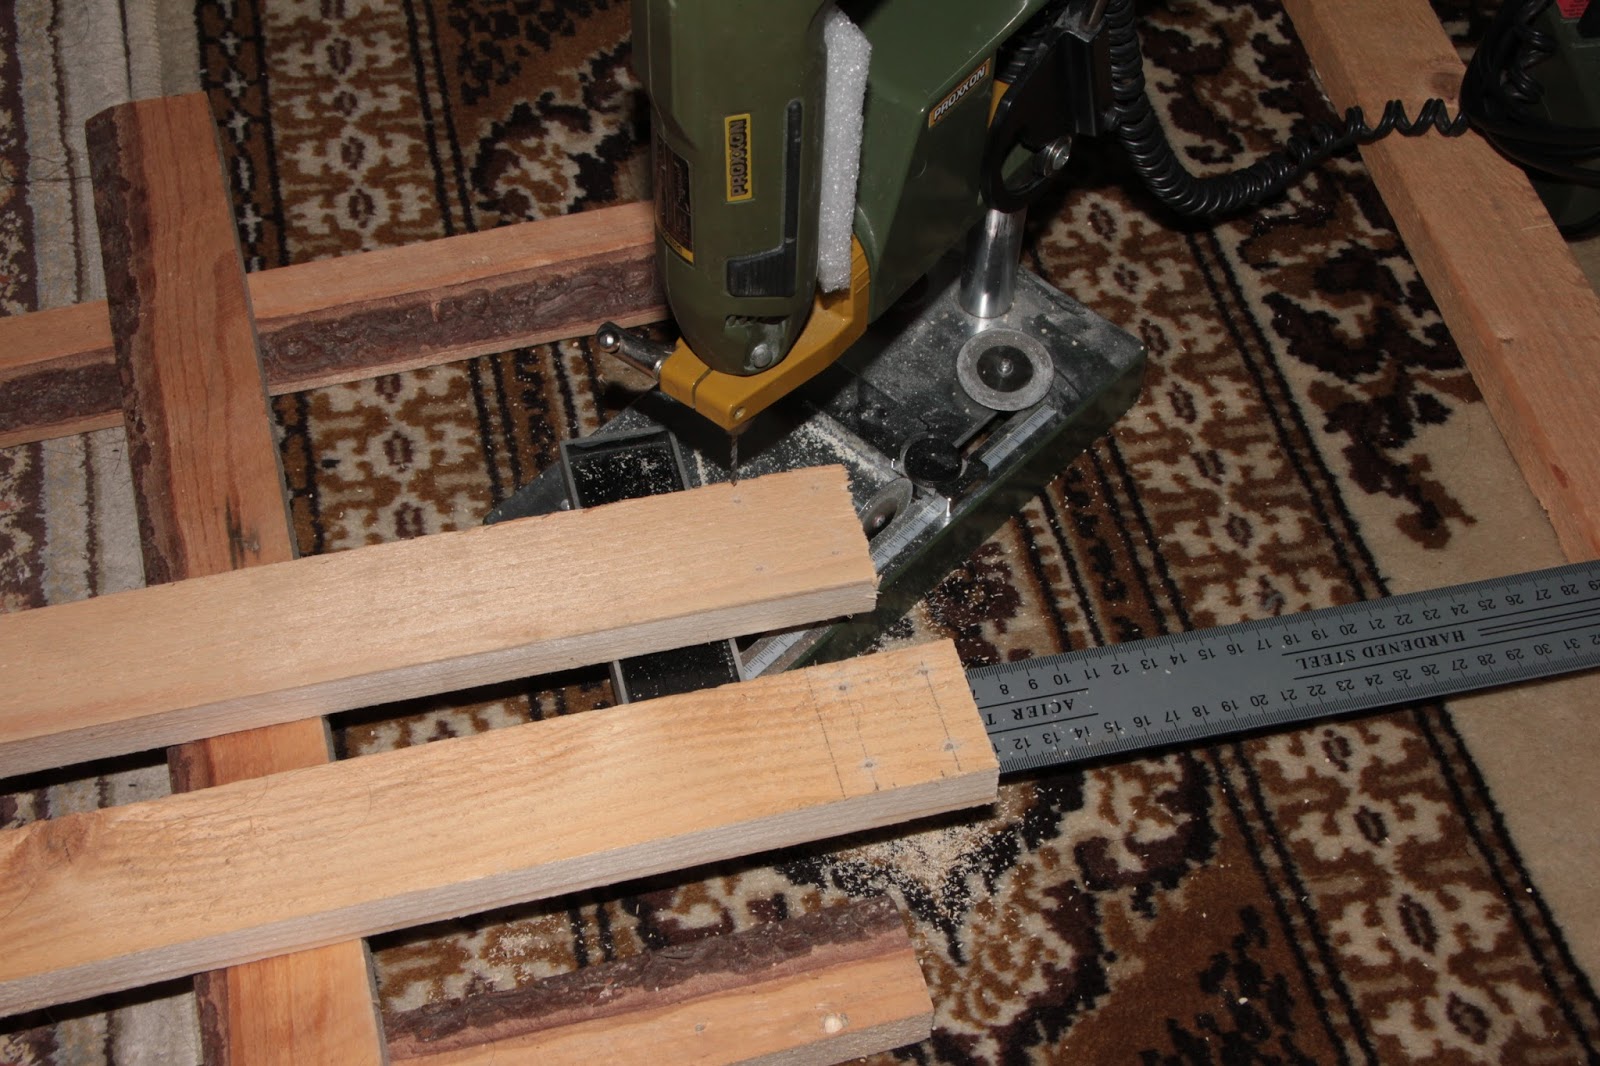
Going with "best practices", when it came to the foot of the stands / "stalks", i figured it would be best to pilot-drill the holes for the mounting screws. For these 3.5x35mm (drywall?) screws i had, the shank looked to be around 2mm, so that's what i went with.

After finishing "step one" of the feet, they're not shaping up to look too bad, i'd say. Especially considering the circumstances. Without the speakers mounted, they actually stand up straight (if undisturbed). Not too shabby, eh?


"Step two" - spotting and drilling the speaker mounting holes. Locate washers within the limits of the "stalk", add speaker to use as a guide, use the protruding tip of a wood drill bit to spot the hole location, remove speaker and washer, drill hole, job done.

For added mechanical stability, of course i needed to add two more "skids" going in the other direction. But since i needed this to sit almost up against the wall, i figured i wouldn't want to make those too long, so they ended up being angled, to give some "toe-in" for the speakers. They ended up being nowhere near parallel to each other, but... eh... They'll be hidden from view anyway, with just the speakers poking out above the sofa corners.

And now the "electrification", as it were. The month before i finally bit the bullet, and placed my first AliExpress order ever, for 15pcs of the little Sanwu-clone TPA3118D2 class-D amplifier boards. Configured as parallel-bridge-tied-load, supplied at 24V, they should be able to push a clean 60W or so into a 4ohm load. In this application though, they'll be supplied with 19V (from older laptop chargers - cheap power!), and since the speakers are rated at 6ohms, that'll be a 3ohm load nominally. That should result in roughly 50W or so, near clipping - way more than plenty, for the application. Nothing wrong with having loads of headroom though, especially with the 30mA or so idle current draw of these little boards. I'm still having trouble getting over how friggin' tiny these things are - less than half (about 40%) of a credit card!

Since these barely need any heatsinking, they'll just get bolted to the "stalks". Not a lot of point in bothering with any enclosures or whatever. I figured i'd go whole-hog, and try to more or less make'em pretty, too - a bit like putting lipstick on a pig (speaking of whole-hog), but hey, why not?

Now, since it would be quite inelegant to have the signal inputs hard-wired to really long cables, and since i've already bothered with aesthetics (and i'm using that word in the broadest of senses), why not use an actual input connector? Initially i figured i'd use some Amphenol panel-mount 1/4" jack sockets i bought ages ago, but then i remembered about that TC Electronic Konnekt 8 i had scavenged the Dice II chip from already. Since that's likely never gonna live again in its intended form (since the ATMega driving the front-panel LEDs was messed up too), i figured i'd reuse the Neutrik XLR-1/4" combo input connectors. Going with the "if you've got it, flaunt it" motto yet again...

Three screws in each oughtta make for a sturdy-enough mounting, wouldn't you say? Yeah, "she'll be 'roight"... XLRs slide in and out smoothly enough, and the 1/4" jack sockets aren't excessively stiff either - i think i can worth with that.

Confirmed - plenty sturdy for how often these will (not) be connected and disconnected... Now onto some (further) electronic tweaks. Since these little TPA3118 amplifier chips actually have a differential input, and my Studio Konnekt 48 (which will be feeding them) also has balanced outputs, why not "go pro" with'em? All that entails is "carving out" a little pad area around the coupling capacitor that goes from the inverting input to ground (thereby disconnecting it from ground), and hooking up the "cold" input to that.

Being the "scavenger" that i am, a piece of one of the four twisted-pairs inside an old CAT5 cable to the rescue! Just for the hell of it, i also ran a wire (ok, a cut-off capacitor leg, for the pedants out there) from the tied-together TRS sleeve / XLR pin 1, to the ground of the amplifier board, although with a certain dose of skepticism, due to both the amplifier power supplies being earthed, as well as the Studio Konnekt 48.
Test-fire no.1 - normal power-up, no sparks or smoke flying out, power LED on the amp board on, so seemingly all good. Well, apart from the horrific level of near-white-noise coming out of the speakers. Not exactly a huge surprise there, actually, since both signal inputs were totally floating. First hunch - tacking on a 10k resistor between the non-inverting and inverting ("hot"/"cold") signal inputs, right on the connector.

Result: beautiful silence at idle. Just the way it should be. Now to hook up an input signal. Well, when i say "input signal", i'll admit, i wasn't exactly counting on the mild levels of hissing, squealing and buzzing i heard, upon connection. Remember the above-mentioned skepticism about that ground-link? Sure enough, upon severing that, said noise vanished, leaving nothing but the pristine sound expected. Well, within reason, obviously (these being just about as far removed from "hi-fi" as you can imagine... almost).
And there they are, in all their magnificent-but-janky-as-hell glory. A quick recap, then: speakers = free; wood = free (thanks to the kindness of a former workmate & neighbour); amps = under 2$ each; power supplies = free (if memory serves); hardware, ie. screws and such = another 2$ or so. Yeah, these'll do nicely as crappy little noise-makers...
No comments:
Post a Comment