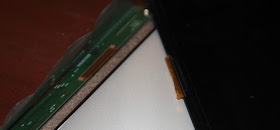
Recycling's all the rage nowadays, right? Right..? Well, either way, freebie raw materials for projects are always welcome, that's something i'm pretty sure we can all agree on. Now, i'm not admitting to be a hoarder, far from it, but i kinda-sorta couldn't bring myself to throw away the dead (read: cracked) laptop LCDs that i had replaced for various clients at work. And what with "finally" expanding this blog onto YouTube, i figured i'd need some extra lighting for the workbench. Catching my drift yet?
Step zero: assessment of raw materials - yep, this one's most certainly a gonner. Not terribly well lit though, it's only a desk-lamp shining through the white plastic backing of the display, which is more on the opaque side. But anyway, that's just so i wouldn't be accused of mistreating or abusing a perfectly good display.
Step one: take busted LCD, and (optionally, carefully) remove the black adhesive tape from the edges of the front side.
The tip of an X-acto knife or scalpel, or even skillful use of the tip of a box-cutter knife can and will ease lifting the first corner. Continuing with a stiff pair of tweezers should do the job nicely - it did, at least in my case.
Step two: slice off the two Kapton flex-ribbon cables between the driver board and the LCD itself. It's easier than un-bonding them "properly", and there's no point in bothering (or wasting time) with that, anyway.
Step three: remove the LCD layer. On the top and side edges, it's basically only retained by the black tape, but on the bottom edge there's also double-sided tape between it, and the frame - it's a bit of a hassle, but nothing terribly dramatic.
Step four: reapply the black tape around the edges, in order to make sure the diffuser and polarizer layers don't fall out, if the device is turned face-down. Apply further sticky-tape if necessary.
Now comes the interesting part - the wiring. This particular set of LCDs i happen to have, are all of the eDP (embedded DisplayPort) "persuasion". The pinout of the associated 30-pin connector is as follows:
In this case, since only the backlight circuitry does anything anymore, i'm only concerned with the power input to that (26-29) and, of course, the ground contacts (18-21), as well as the enable (22) and PWM-dimming (23) pins. After browsing through the datasheets of a few eDP LCDs, it looks like the enable signal is "on" for any and all voltages between 3.0V and 5.3V. Since i want all the light i can get, there's no need to bother with any fancy circuitry for the PWM dimming - 100% duty cycle is just fine, so it gets connected to the enable pin right next to it.
And now, for the "shifty" bit. Since i want these things to be as simple as possible - basically just power on/off - the way to source a suitable voltage for the enable pin is obvious. You guess it, ye olde two-resistor voltage divider. Now, as can be seen in the pinout of the connector, there are two "NC" ("No Connection") pins between the backlight power supply and the rest. For that reason alone (well, that and because i had some at hand), i chose a 1206-package resistor for the top half of the divider.
Anyway, back to the dirty work. Since the pins of the
connector are quite small, and due to how physics works (surface tension
of the solder, and whatnot), it can be quite interesting to reliably
and controllably bridge two (or more) pins together, especially when
further soldering needs to be done on them. The power connections are
easier, with them being two sets of four adjacent pins. For the enable
and PWM dimming pins though, i decided to slip a thin strand of copper
wire between said pins, and add a small glob of solder. The wire extends
out enough to go between the end-caps of the two resistors of the
divider.
The values of the two resistors aren't anywhere near as critical as the ratio. Since these are from laptops, they work with input voltages of up to 19-20V (ie. straight from the mains adapter, aka charger), and down to 10V or so (a 3S pack of lithium-ion batteries that's nearly "empty"). "Worst case", at a 10V-ish input, we'd need a minimum of 3V out of the divider, while "best case", at 19V, we'd need a maximum of 5V or so. That works out to a ratio of 1:3 to 1:4.
On the first attempt, the closest-at-hand 1206 resistors i had were a few 20k ones for the "top", and i had a small bag with a few dozen 4.02k ones (giving a ratio of 1:6). As it happened, that was enough to turn on the backlight controller, seemingly at full brightness - good'nuff for me...
Aaaand we have a winner!.. This is actually the second "zombie-fied" LCD i've made, and seems to be a bit more power-hungry than the first - 124mA at 18.8V; the previous one merely sipped about 100mA at 19V. Either way, a promising start. I suppose the one down-side of these is that they're decidedly the "cold white" variety, but it's not like it's the end of the world. Anyway, next one's going on video...


No comments:
Post a Comment